How to send invoices from your own domain
Who can do this
Section titled “Who can do this”- Company Owners and Company Admins with access to Settings & Apps.
- You will need credentials for your email account (Google, Microsoft, or SMTP).
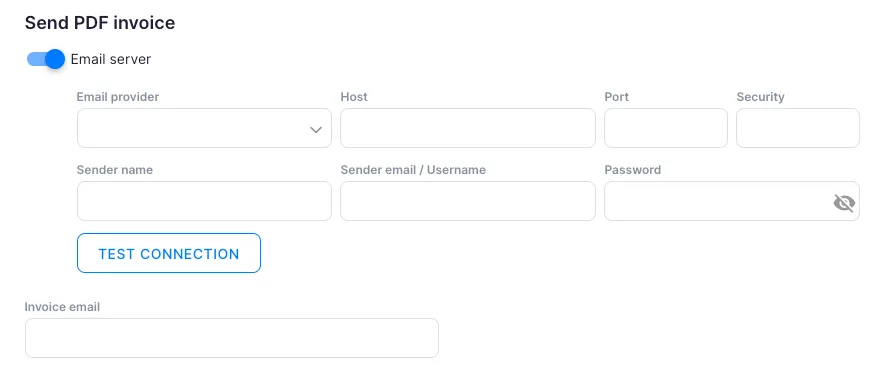
Step 1 — Connect your email account
Section titled “Step 1 — Connect your email account”- Open Settings & Apps from the main navigation.
- Select the Emails app.
- Connect your email account — options include:
- Google Gmail — via Google account sign-in
- Microsoft Outlook / Microsoft 365 — via Microsoft account sign-in
- Custom SMTP — fill in the host, port, security, sender name, username, and password
- Click Send a test email to confirm the setup works.
- Click Save.
Step 2 — Enable the custom domain in Billing
Section titled “Step 2 — Enable the custom domain in Billing”- Open Settings & Apps > Billing > Settings.
- Under Send PDF invoice, find Email service (custom domain) and enable the toggle.
- Select the connected email account from the dropdown.
- Optionally, enter one or more addresses in Send invoice copy to to receive a copy of every invoice sent.
- Click Save.
From this point, invoices are sent from your company’s email address.
Troubleshooting
Section titled “Troubleshooting”Test email fails to send
Section titled “Test email fails to send”Double-check the Host, Port, and Security settings. For Gmail, ensure an App Password is configured if two-factor authentication is enabled. For Outlook, verify that SMTP relay is allowed for your account.
Invoices are still being sent from the default address after setup
Section titled “Invoices are still being sent from the default address after setup”Confirm that the Email service (custom domain) toggle is enabled and the correct account is selected. Also check that you clicked Save.
Client invoice emails are landing in spam
Section titled “Client invoice emails are landing in spam”Set up SPF, DKIM, and DMARC DNS records for your domain to improve email deliverability. Contact your email provider or domain registrar for guidance.
I do not know my email server credentials
Section titled “I do not know my email server credentials”For Gmail, use smtp.gmail.com on port 587 with TLS. For Outlook, use smtp.office365.com on port 587 with STARTTLS. Contact your IT administrator for company-managed accounts.