How to manage billable and non-billable time?
Every time entry in Uku can be marked as billable or non-billable. Billable time counts toward client invoices; non-billable time is tracked for visibility but excluded from billing. Knowing how the default works — and how to override it — gives you control over what shows up on invoices.
Who can do this
Section titled “Who can do this”- Any team member can toggle billable/non-billable on their own time entries.
- Company Admins and Company Owners can configure the company-level billable default in Settings & Apps → Billing → Products.
How the billable default works
Section titled “How the billable default works”The default billable status for a new time entry comes from two sources, in this order of priority:
- Topic override — if the task belongs to a topic that has a billable setting, that topic setting takes priority over everything else.
- Company billing settings — if no topic override applies, the company-level default billable setting is used.
You can always override the default on any individual time entry by clicking the billable toggle.
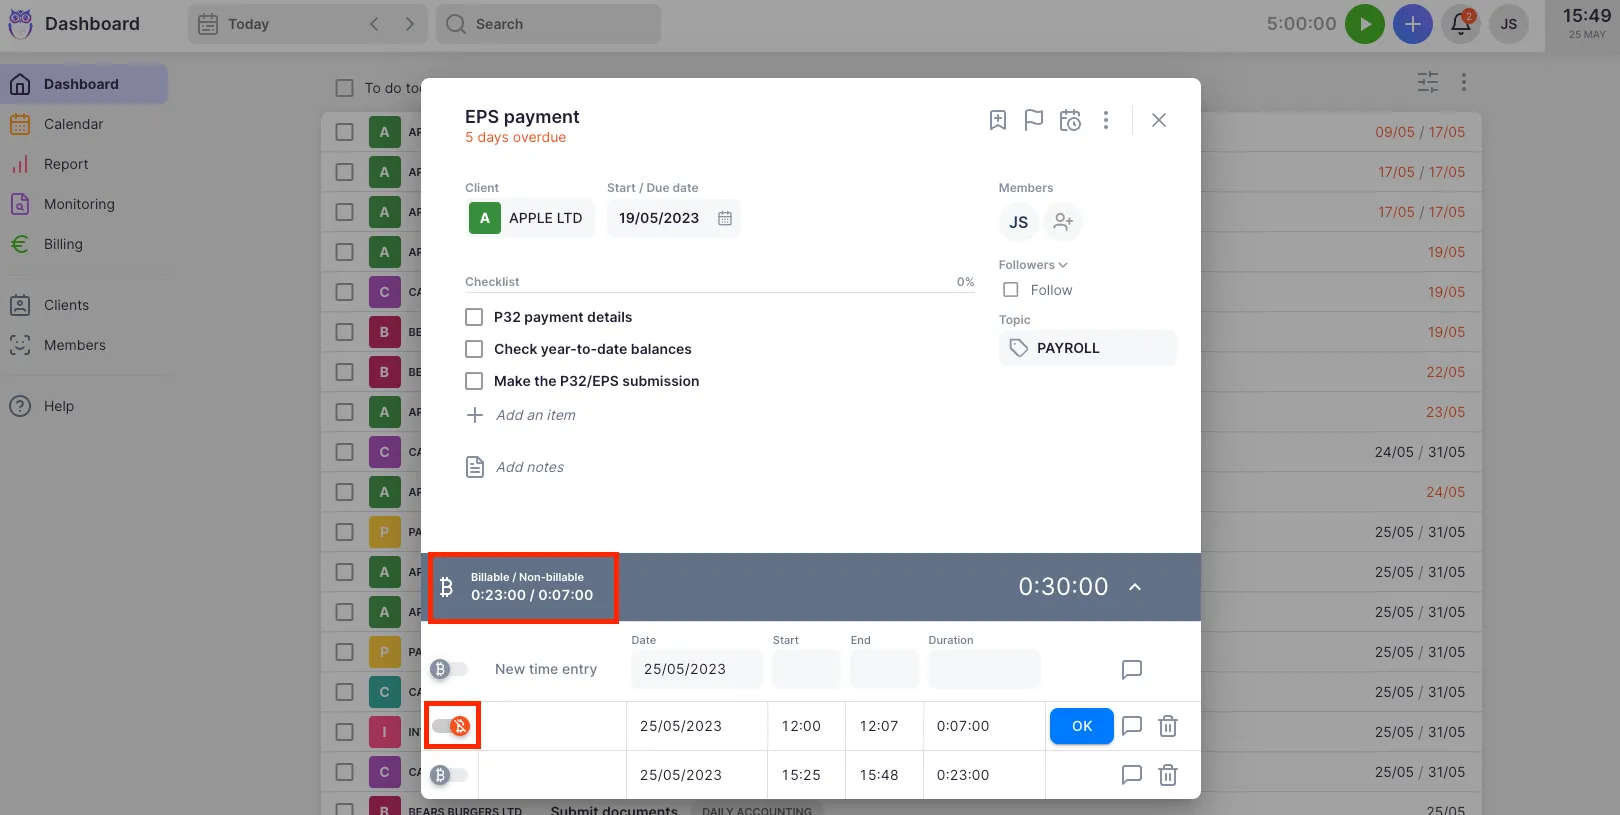
How to toggle billable status on a time entry
Section titled “How to toggle billable status on a time entry”- Open the task where you want to adjust billable status.
- Click the time display to expand the timesheet panel.
- Find the time entry and click the billable toggle on the left side of the row.
- The entry switches between billable and non-billable. The change is saved automatically.
Viewing billable time in reports
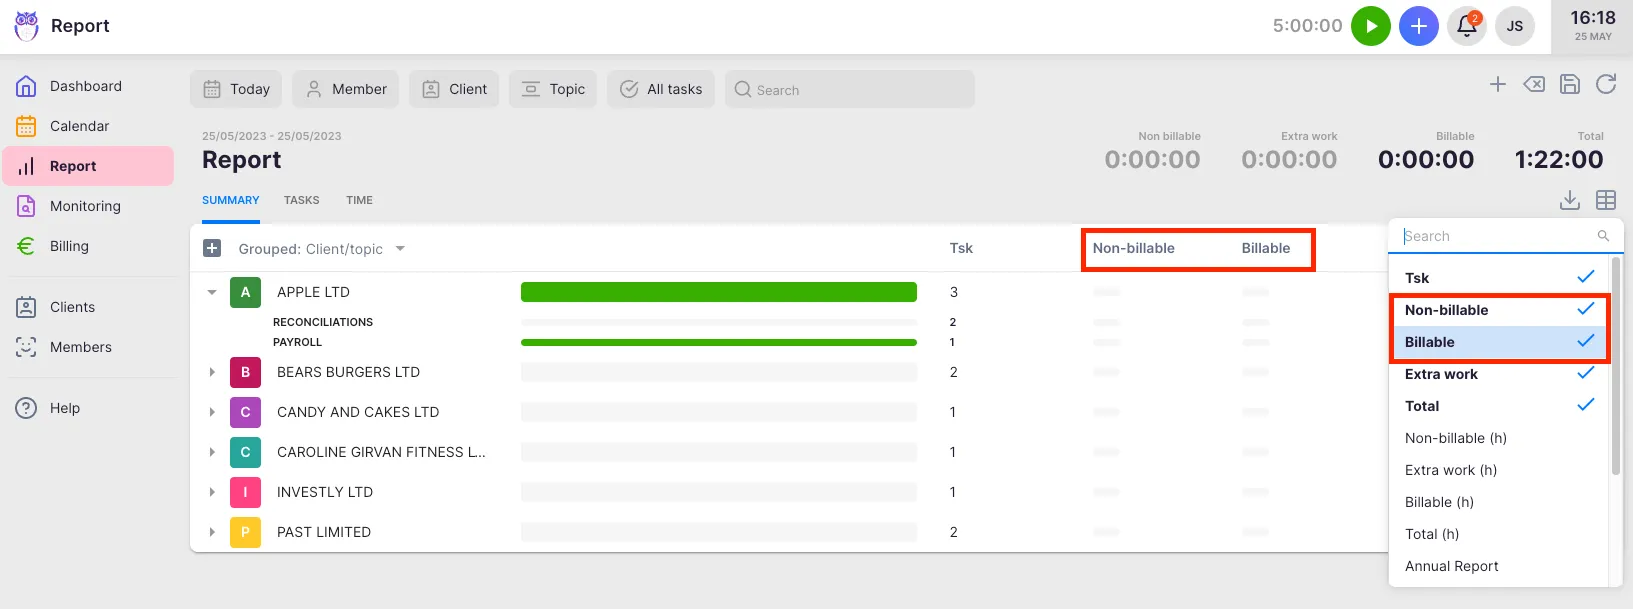
Section titled “Viewing billable time in reports”- Select Report from the main navigation menu.
- Click the Properties button in the report toolbar to open the column chooser.
- Enable the Billable and Non-billable columns.
The Summary tab shows billable and non-billable totals per client or member grouping. The Time tab shows the billable toggle status on each individual entry.
Configuring the billable default for invoicing
Section titled “Configuring the billable default for invoicing”To control which time entries a product includes on invoices, configure the setting on the product itself.
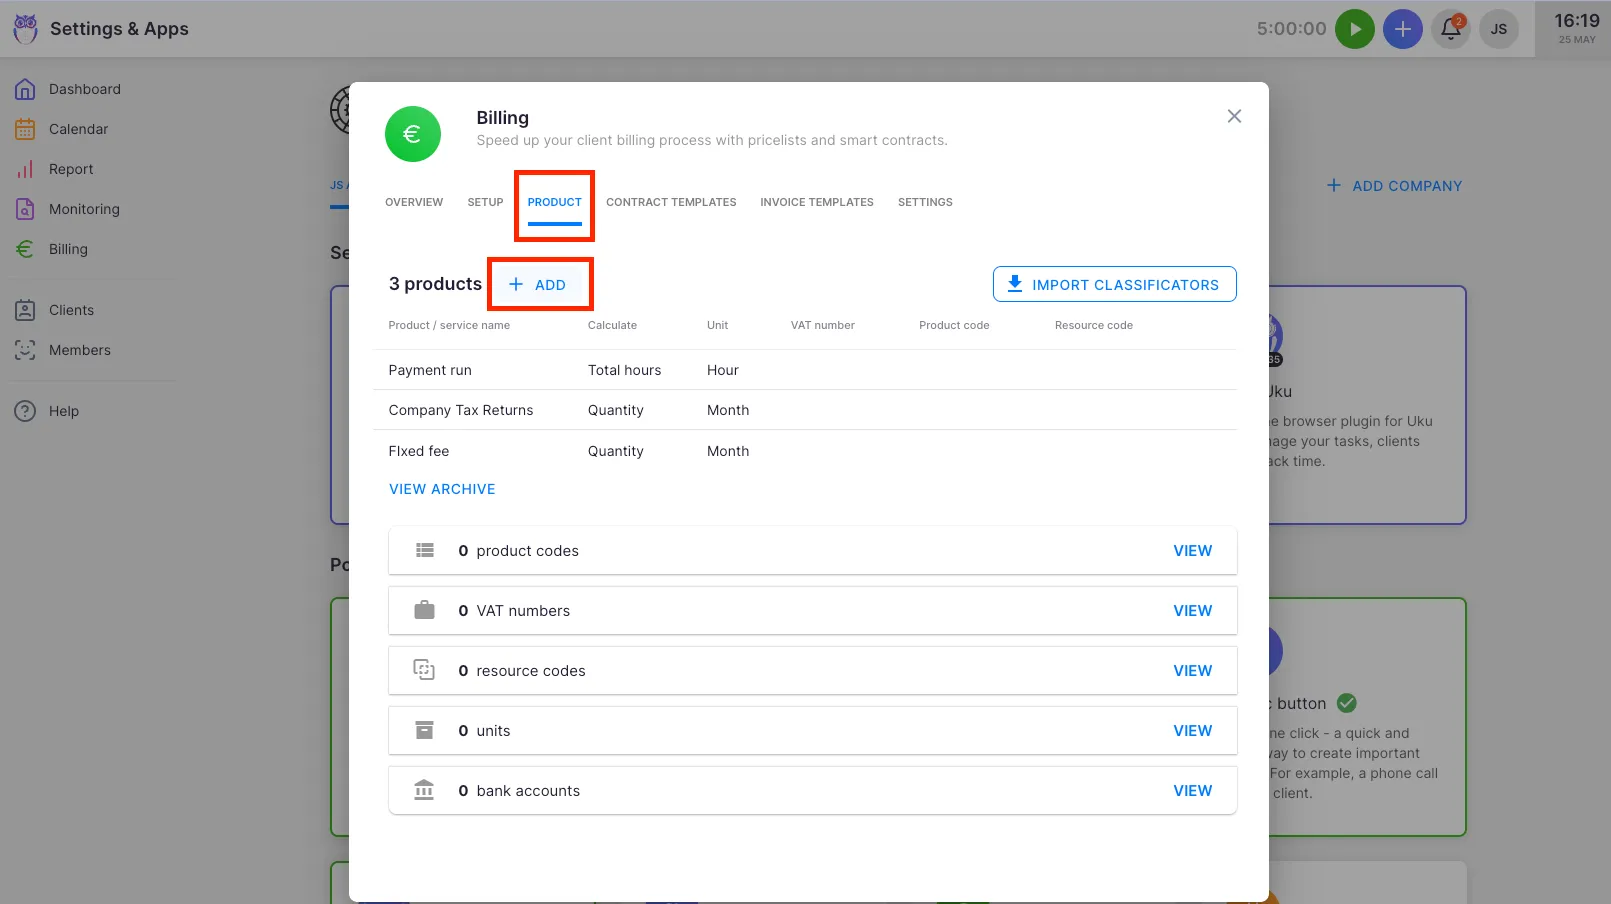
- Select Settings & Apps from the main navigation menu.
- Open Billing and select Products.
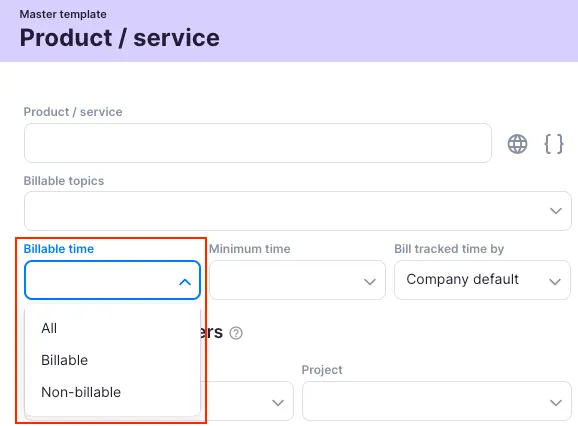
- Click the edit (pencil) icon next to the product you want to configure.
- In the Billable time dropdown, select which time entries this product should include on invoices (billable only, non-billable only, or all time).
- Save the product.
Troubleshooting
Section titled “Troubleshooting”Non-billable time is appearing on the invoice
Section titled “Non-billable time is appearing on the invoice”Check the product attached to the client’s contract. Open Settings & Apps → Billing → Products, find the product, and review its Billable time setting. If it is set to “All time,” non-billable entries will also be included on invoices.
The billable toggle is not visible on a time entry
Section titled “The billable toggle is not visible on a time entry”The billable feature must be enabled in your billing settings. Contact your Company Admin to confirm billing is active and configured for that client’s contract.
Time marked billable by mistake
Section titled “Time marked billable by mistake”Open the task, expand the timesheet panel, and click the billable toggle on the incorrect entry to switch it back to non-billable. Do this before the invoice is generated — once a billable entry is included on a finalized invoice, a credit note may be needed to correct the billing.
The report does not show billable columns
Section titled “The report does not show billable columns”Click the Properties button in the report toolbar and enable the Billable and Non-billable columns. Each report tab remembers its own column visibility independently.