How to create and send invoices
Who can do this
Section titled “Who can do this”- Company Owners and Company Admins have full invoice access by default.
- Company Members can create and edit invoices only when Allow all Company Members to view and create invoices is turned on in Settings & Apps > Billing > Settings.
- A Company Member holding Client Admin permission on a client gains invoice access on that client when Allow contract and invoice management for users with Client Admin permission is enabled.
- Company Members can send finalised invoices only when Allow members to send invoices to clients is turned on.
Creating a new invoice
Section titled “Creating a new invoice”To start a new manual invoice:
- Open Billing from the main navigation and click New invoice, or
- Open a client profile, go to Financials > Invoices, and click New invoice. Creating from within a client profile pre-fills the client fields automatically. Otherwise, select the client in the header section.
Invoice header fields
Section titled “Invoice header fields”The top of the invoice is split into Seller (left) and Buyer (right):
- Seller information is read-only and pulled from your company settings (company name, address, registration number, VAT number). To change seller details, update them in Settings & Apps > Company.
- Buyer information is read-only and comes from the selected client’s profile. To change buyer details, update the client record before creating the invoice.
Below the seller and buyer blocks, fill in:
- Invoice number — Uku auto-generates the next number in sequence. You can override it manually before the invoice is finalised.
- Reference number — optional field for the client’s purchase order number or your internal reference.
- Invoice date — defaults to today.
- Due date — calculated from the client’s payment terms; you can change it. Your bank account details appear below the seller info and print on the final PDF. These come from your company settings.
Adding line items
Section titled “Adding line items”Click Add row to insert a line item. A dropdown offers two options:
- Select a product — pre-fills description, unit price, and tax rate from the product definition.
- Empty row — a blank line you fill in manually.
Each row has these editable fields:
| Field | Description |
|---|---|
| **Description** | What the line item is for |
| **Quantity** | Number of units (defaults to 1) |
| **Unit** | Hours, pieces, months, etc. |
| **Price** | Unit price before tax |
| **Discount** | Optional discount percentage for this line |
| **Tax** | Tax rate from your configured tax rates |
| **Sum** | Calculated automatically (quantity × price, minus discount) |
The Totals section at the bottom shows the subtotal, any discount total, a tax breakdown by rate (for example, “VAT 22%: 44.00”), and the grand total — all updating in real time. Below the line items, a rich text editor lets you add payment instructions or notes that appear on the PDF.
Saving as a draft
Section titled “Saving as a draft”Click Save to save the invoice as a draft. Drafts are fully editable — you can change header fields, add or remove rows, and modify amounts at any time. Draft invoices do not lock the invoice number and are not yet official.
Finalising the invoice
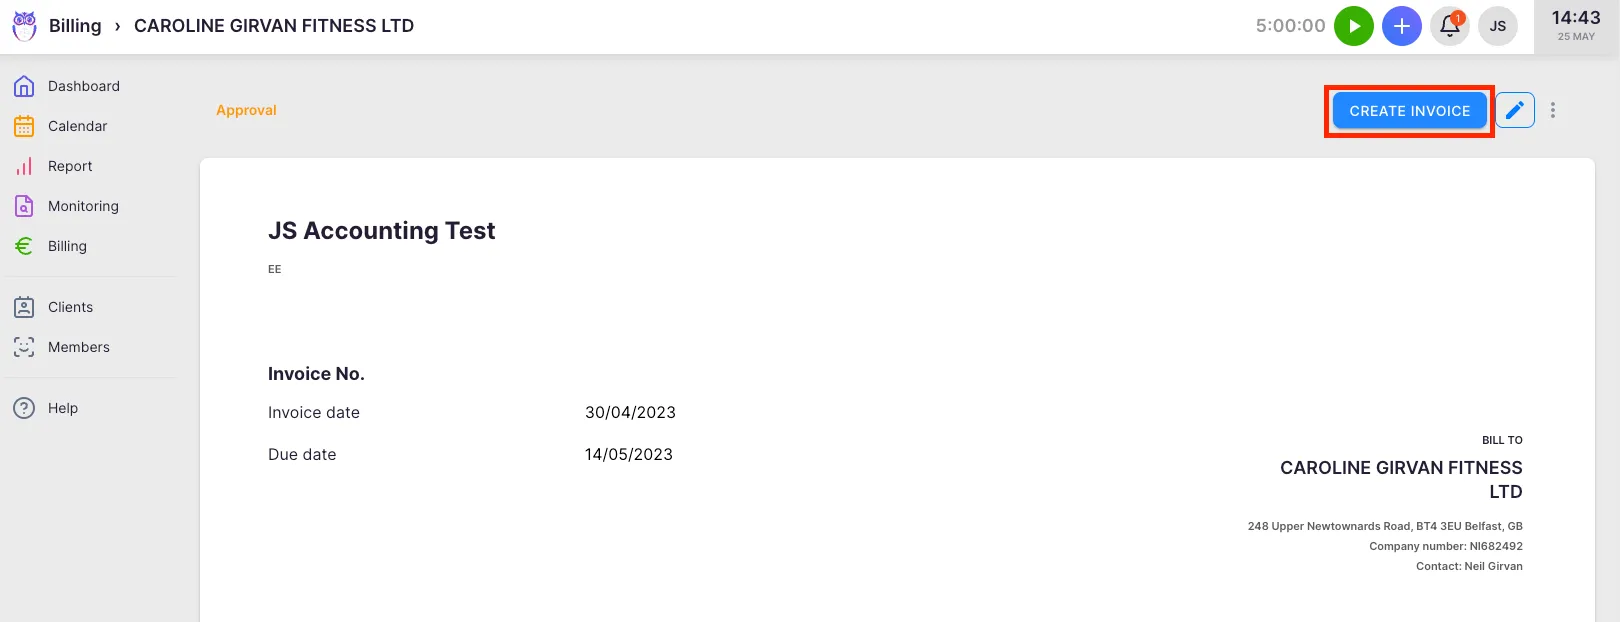
Section titled “Finalising the invoice”When the invoice is ready, click Create invoice and confirm. The status changes to Created:
- The invoice number is locked.
- The PDF can be generated and sent.
- Send to client and Mark paid become available.
- The invoice can be exported to your accounting software. To edit a created invoice, click the pencil icon — but make changes carefully if the invoice has already been sent or exported.
Previewing and downloading the PDF
Section titled “Previewing and downloading the PDF”Click Show PDF on the invoice view to see an inline preview of exactly what the client will receive. Click Download PDF to save a copy locally.
Creating invoices in bulk
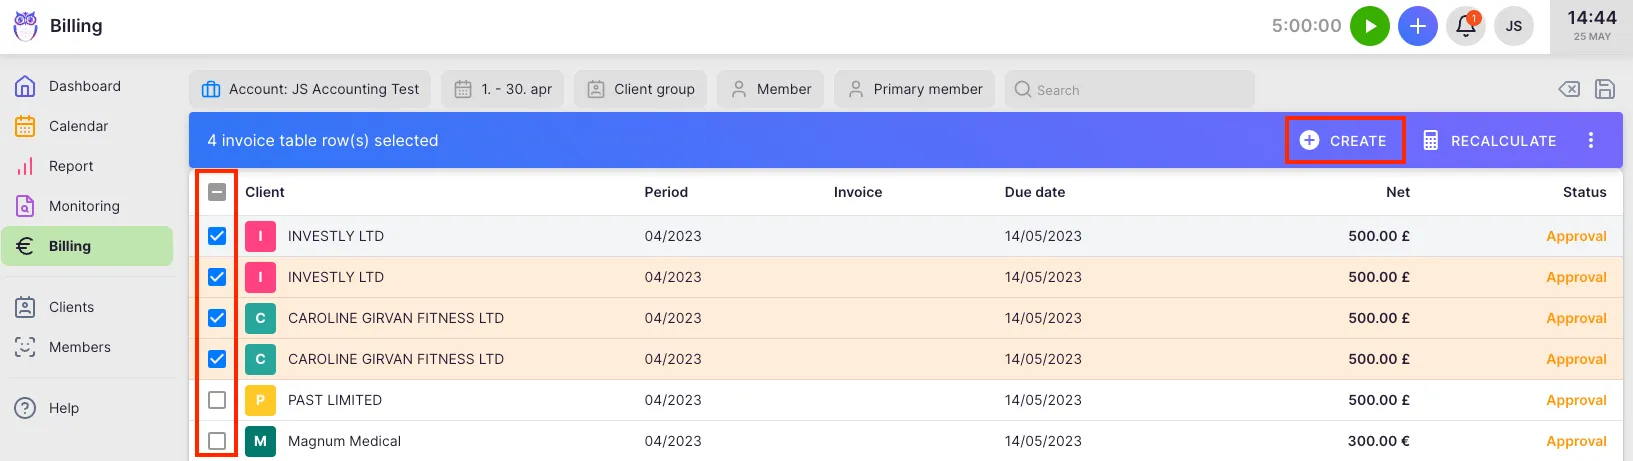
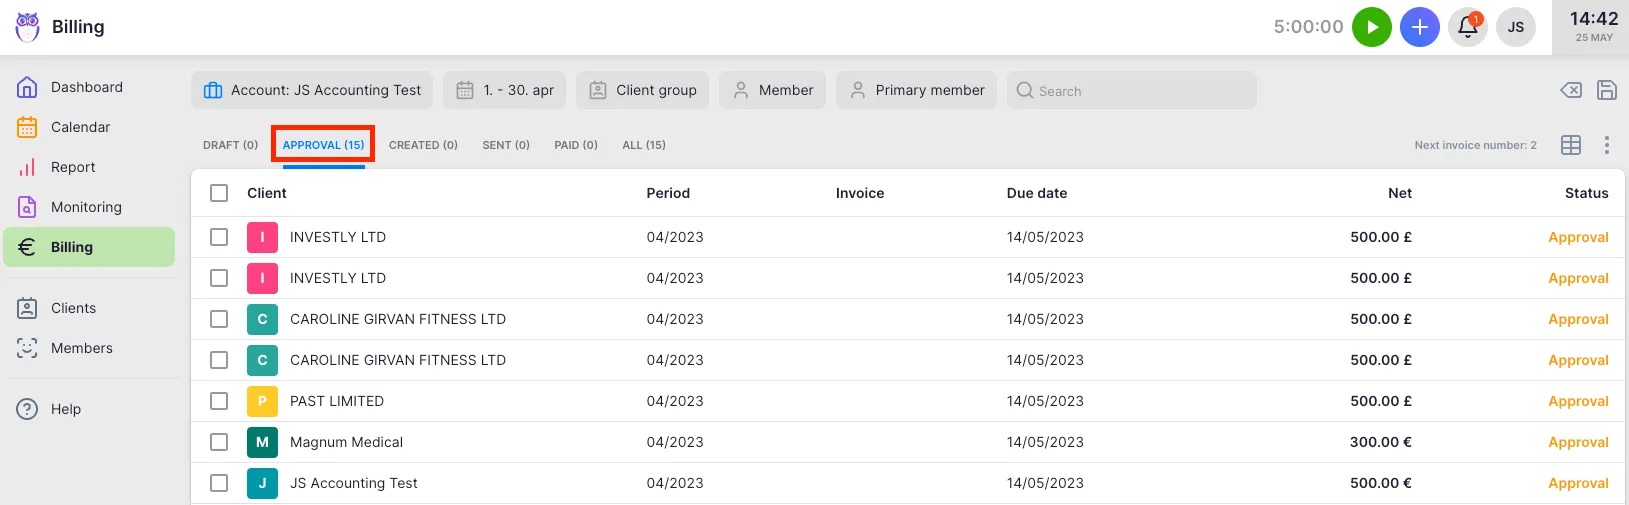
Section titled “Creating invoices in bulk”- Go to the Draft or Approval tab in Billing.
- Select one or more invoices using the checkboxes.
- Click Create in the action bar at the bottom of the page.
Sending invoices to clients
Section titled “Sending invoices to clients”Once an invoice has Created status:
- Go to the Created tab in Billing.
- Select the invoices you want to send.
- Click Send to client in the action bar. Uku emails the PDF to the client’s email address on file. To send from your own domain, connect your email account in Settings & Apps > Emails and enable the custom domain toggle in Settings & Apps > Billing > Settings. See How to send invoices from your own domain.
Tracking delivery status
Section titled “Tracking delivery status”After sending, the status info block at the top of the invoice view shows a timeline:
- Exported — date/time and destination if the invoice was sent to accounting software
- Sent PDF — date/time the PDF email was sent and recipient addresses
- Sent e-invoice — date/time if an e-invoice was transmitted
- Paid — amount and date once marked as paid
- Annulled — date if the invoice was voided
Recalculating an invoice
Section titled “Recalculating an invoice”Recalculate when additional work was tracked after the invoice was created, or when the contract changed.
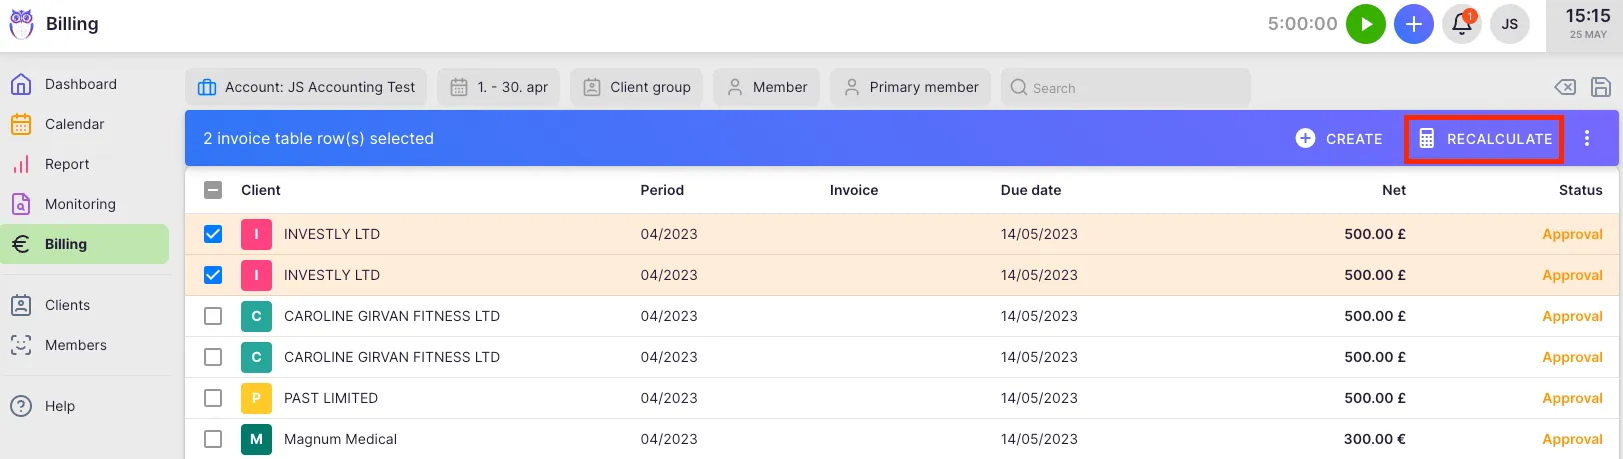
Draft or Approval invoices (bulk):
- Go to the Draft or Approval tab.
- Select one or more invoices.
- Click Recalculate in the action bar.
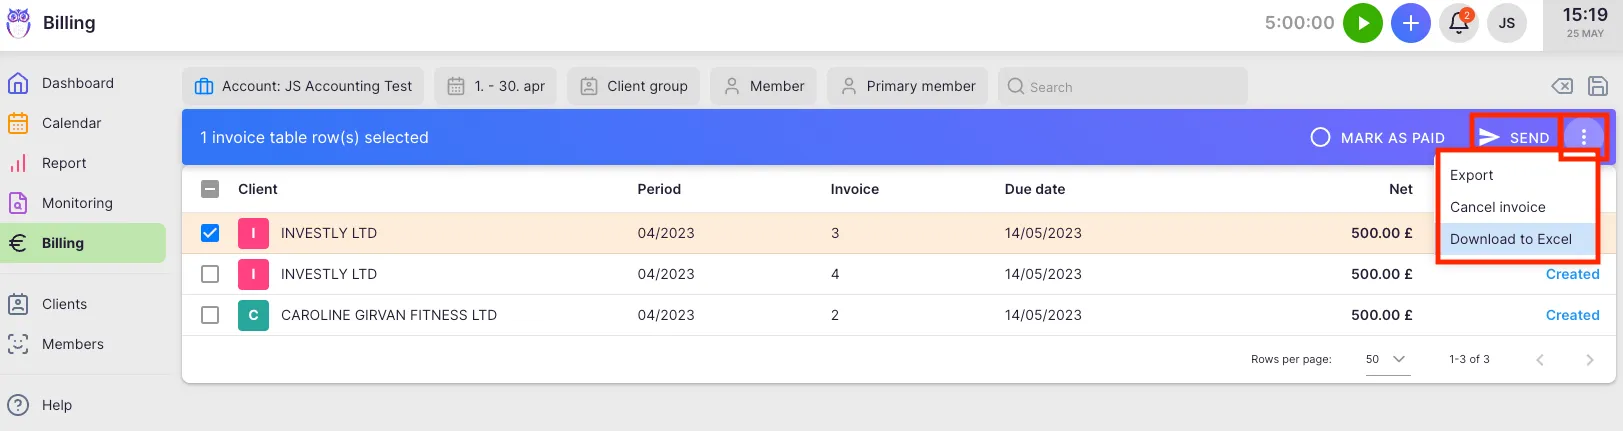
Created invoices (individual):
- Open the invoice from the Created tab.
- Click the three-dot menu in the top-right corner.
- Select Recalculate invoice and confirm. The invoice returns to draft status and updates with the latest data. Review it and click Create invoice again when ready.
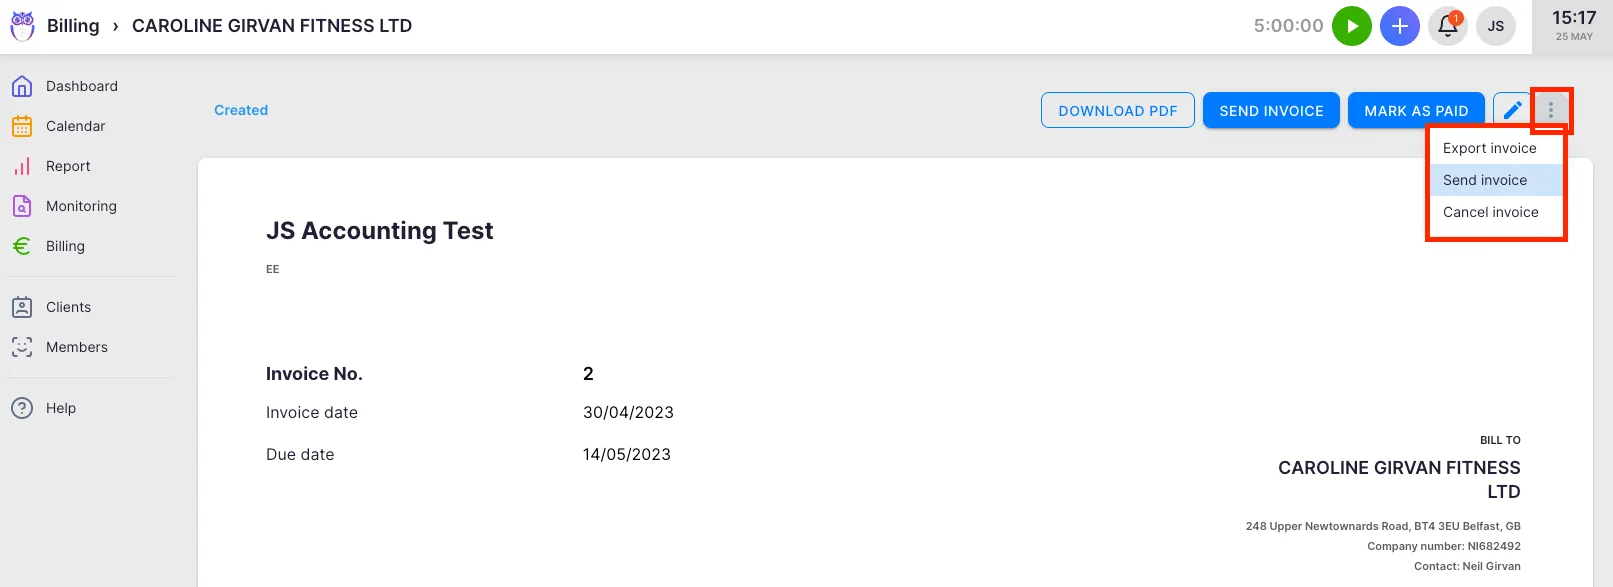
Additional actions on a created invoice
Section titled “Additional actions on a created invoice”From the three-dot menu on a created invoice:
- Export to accounting — push the invoice to your connected accounting software.
- Update status — refresh the invoice status from your accounting integration.
- Mark paid / Mark unpaid — manually toggle payment status.
- Credit note — create a credit note against this invoice. Use this for sent or paid invoices. See Credit notes and corrections.
- Void invoice — annul the invoice. Voided invoices move to the Cancelled tab (the action is “Void”; the tab is named “Cancelled” in the UI). Use Void for invoices that have not yet been sent or paid.
- Restore invoice — available in the Cancelled tab; returns the invoice to Approval or Created status.
- Delete invoice — permanently removes a manual invoice (not available for contract-generated invoices).
Filtering by action state
Section titled “Filtering by action state”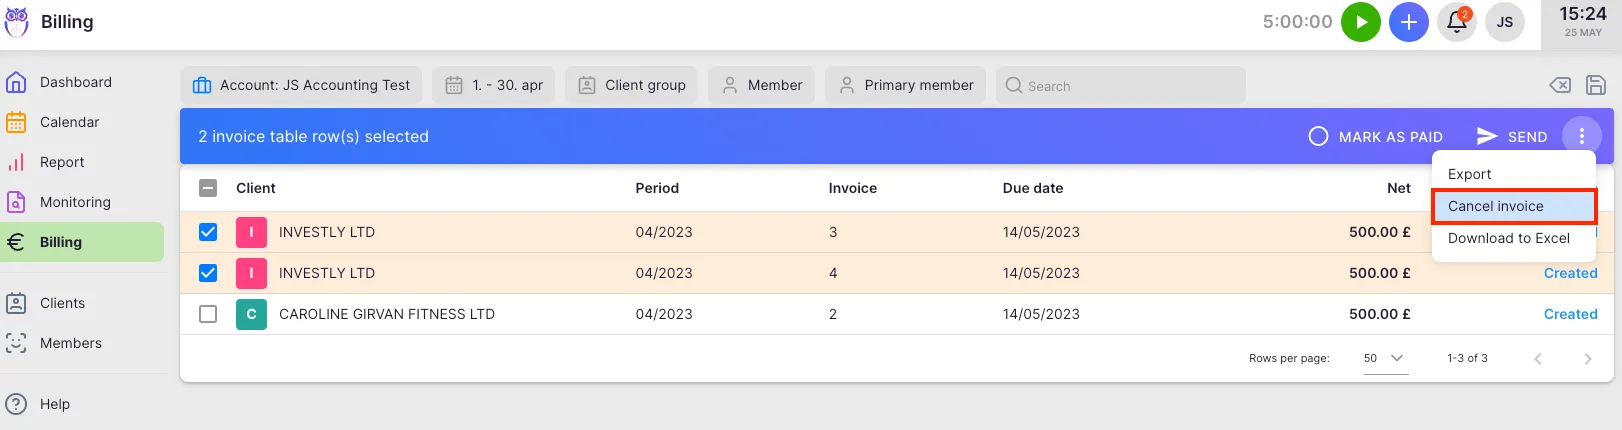
The Invoice action state filter helps you find invoices that still need attention:
- Not sent — finalised invoices not yet emailed to the client
- Not exported — finalised invoices not yet exported to accounting software These filters apply to finalised invoices only (Created, Sent, or Paid status). Draft invoices are excluded.
Troubleshooting
Section titled “Troubleshooting”No draft invoices are appearing for the current month
Section titled “No draft invoices are appearing for the current month”Ensure the client has an active contract with products configured. Invoices are only generated automatically when a billing contract is in place.
Invoice amounts are incorrect after recalculation
Section titled “Invoice amounts are incorrect after recalculation”Verify that contract changes or additional work entries were saved before recalculating. Recalculation pulls the latest data from the contract and tracked work.
Invoices are not being received by clients
Section titled “Invoices are not being received by clients”Check the client’s email address in their contact settings. If sending from your own domain, verify your email setup in Settings & Apps > Emails. See How to send invoices from your own domain.
The Not sent or Not exported filter shows no results
Section titled “The Not sent or Not exported filter shows no results”These filters apply only to finalised invoices (Created, Sent, or Paid). If all invoices are in Draft status, no results will appear.
A restored invoice appears in an unexpected tab
Section titled “A restored invoice appears in an unexpected tab”This is expected. Restored invoices are placed in Approval or Created based on the billing period the invoice belongs to, not the current date.