How to use your calendar?
This content is not available in your language yet.
The calendar gives you a visual overview of your tasks, team schedules, and important dates — all in one place. Plan your work by week or month, create tasks by clicking on any date, and reschedule them by dragging between days.
Who can do this
Section titled “Who can do this”- All team members can view and use the calendar.
- Company Admins and Company Owners can create and edit company events.
- Vacation, remote work, and absence features require the Vacations app to be enabled for your company.
Opening the calendar
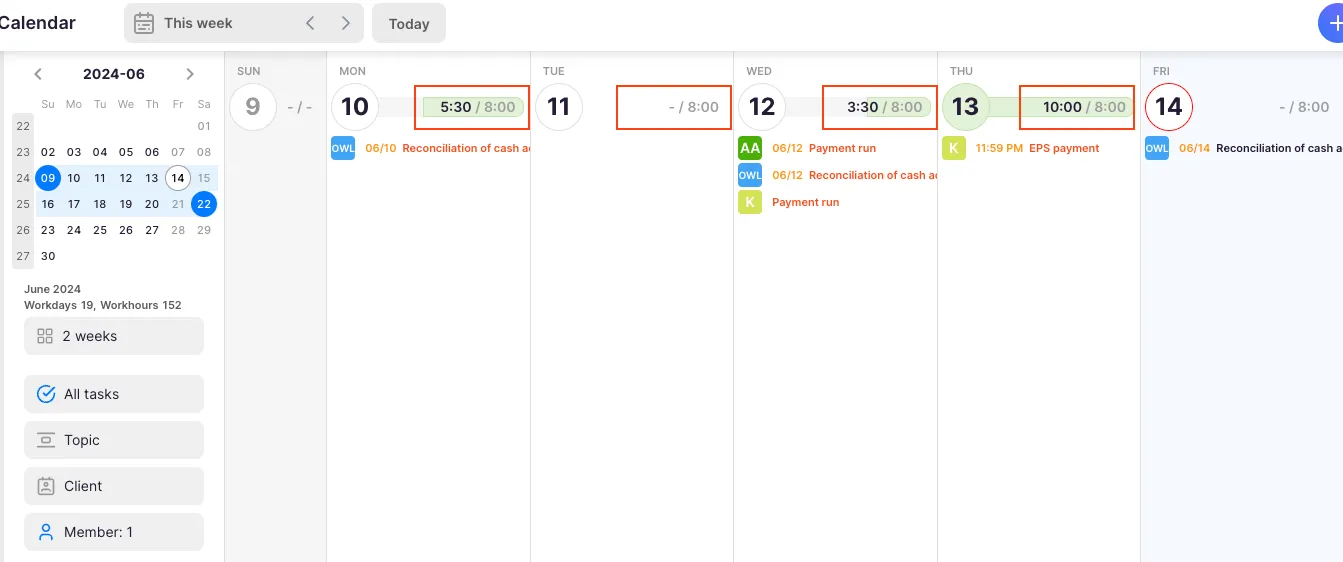
Section titled “Opening the calendar”Select Calendar from the main navigation menu. The calendar opens in the 1 week view by default.
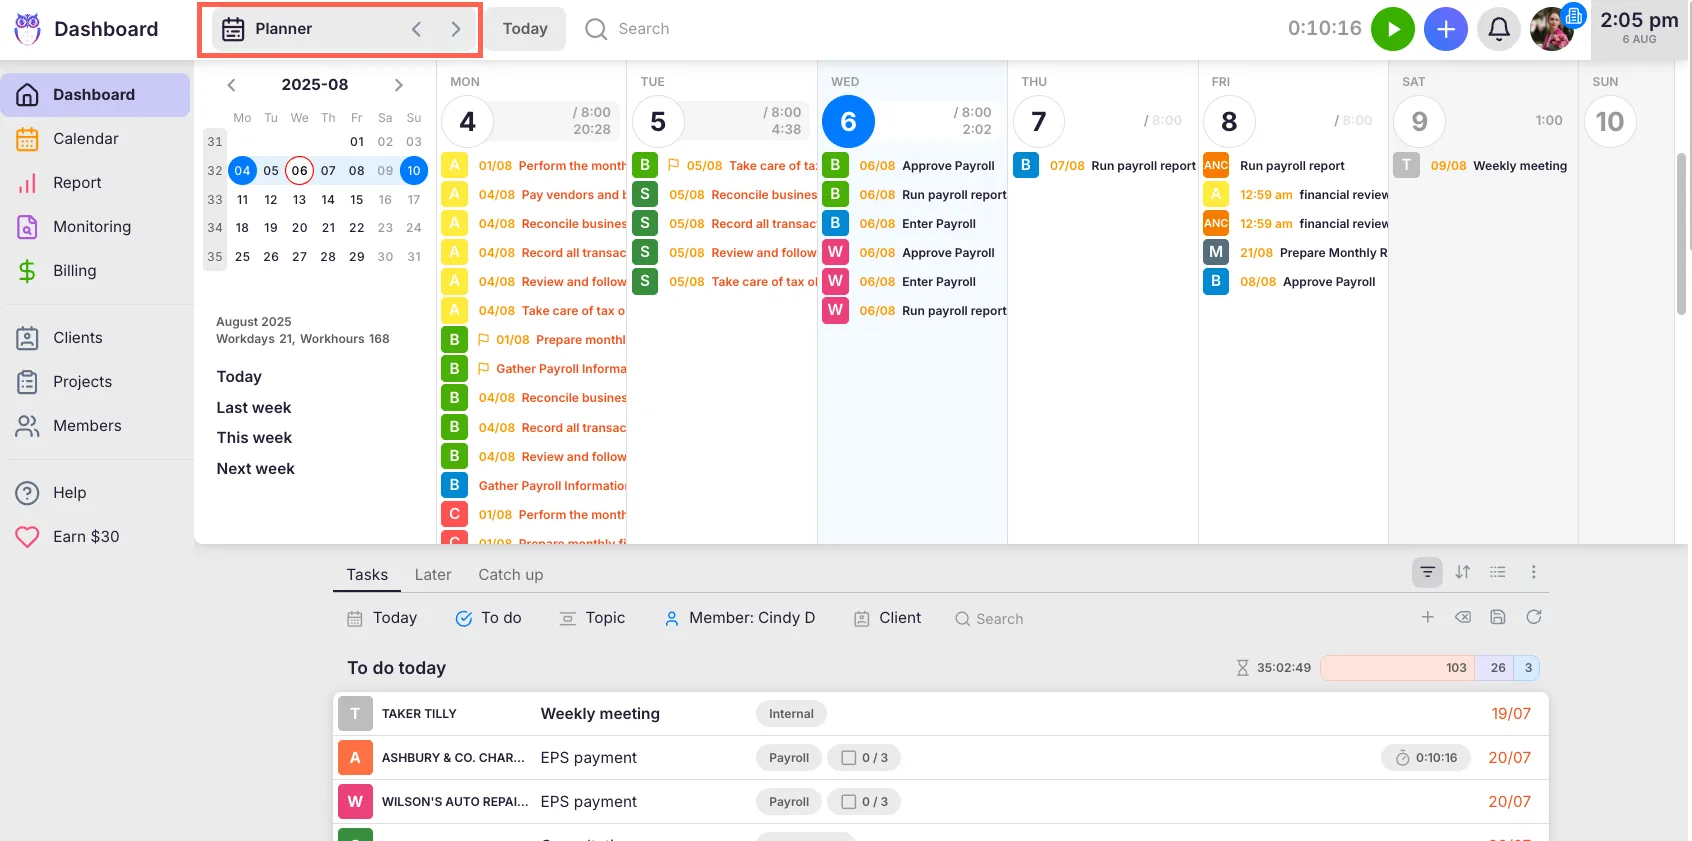
Calendar views
Section titled “Calendar views”Switch between views using the dropdown in the left sidebar:
- 1 day — shows a single day in full detail
- Mon - Fri — shows the five workdays side by side
- 1 week — the default view, Monday through Sunday
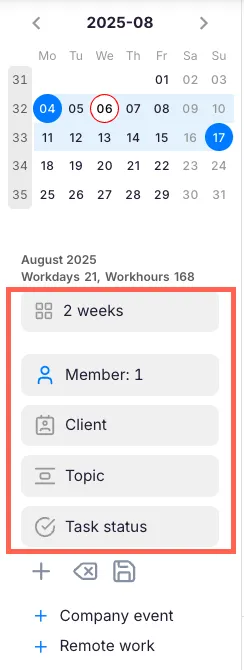
- 2 weeks — two full weeks stacked vertically
- 3 weeks — three full weeks stacked vertically
- Month — the entire month with weeks stacked vertically
Use the mini calendar at the top of the sidebar to navigate to a specific date. Click any date number in the main calendar area to select that day. Weekend columns automatically collapse when there are no tasks or tracked time on those days.
Calendar settings
Section titled “Calendar settings”Expand the Settings panel at the bottom of the left sidebar to control which items appear on your calendar. Each item has a checkbox you can toggle on or off:
- Tasks — your assigned tasks, shown on their scheduled date
- Vacations — vacation, sick leave, parental leave, and other absences for team members (requires Vacations app)
- Remote work — days when team members are working remotely (requires Vacations app)
- Holidays — public holidays for your country
- Tax dates — upcoming tax filing and payment deadlines
- Accounting news — relevant accounting updates
- Company events — events created by your company’s Company Admins
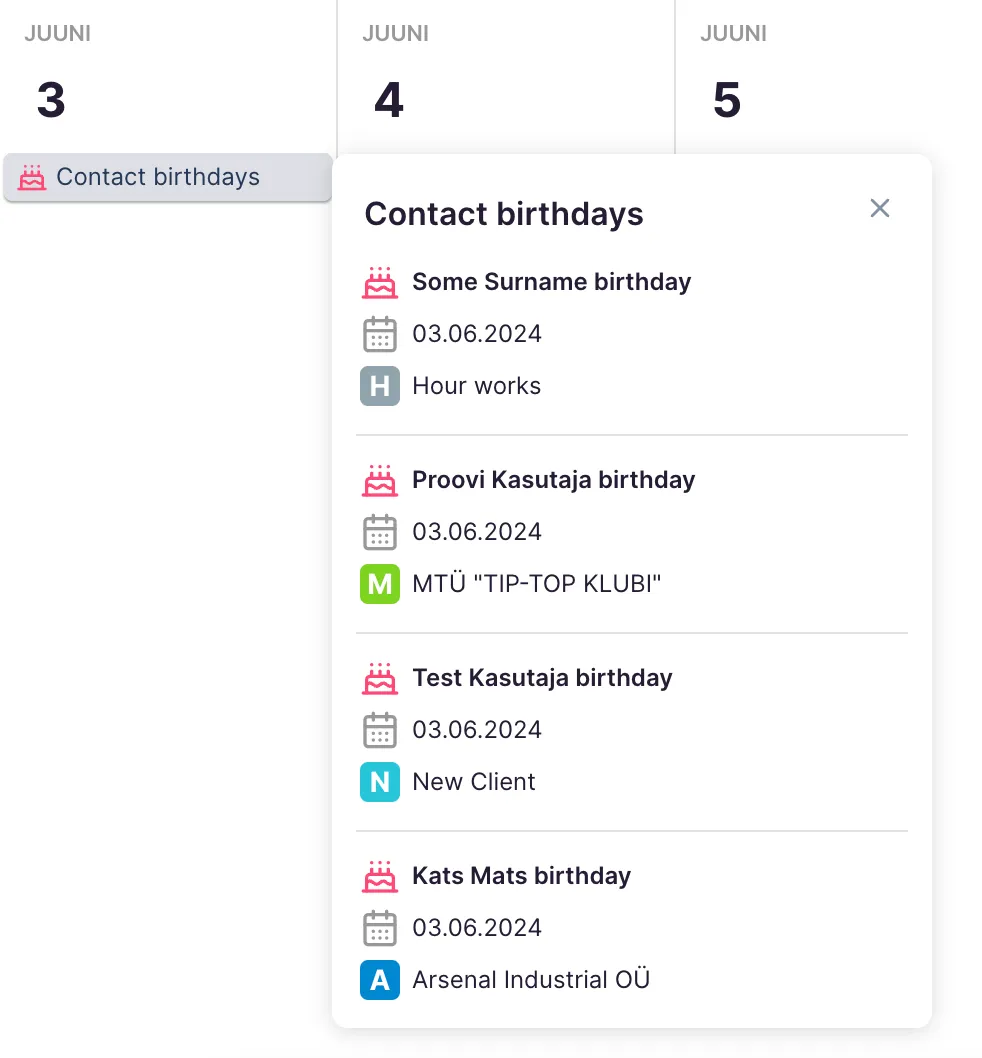
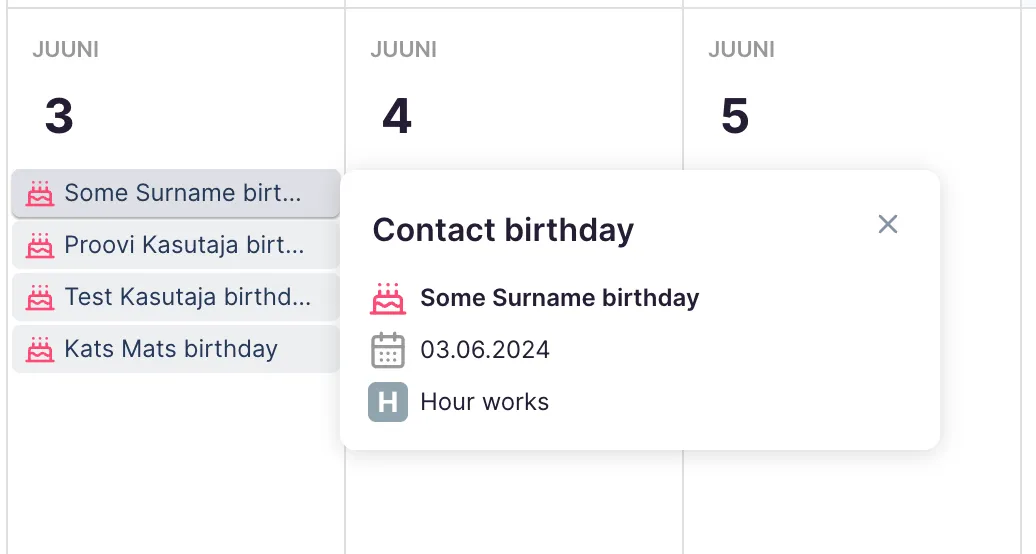
- Member birthdays — birthdays of team members (when enabled by your company)
- Contact birthdays — birthdays of client contacts (when enabled by your company)
For vacations, remote work, and birthdays, you can choose to Group items or Don’t group using the arrow button next to each setting. Grouping combines multiple entries of the same type into a single line (for example, “3 away” instead of three separate entries).
Your settings are saved to your account and persist across sessions.


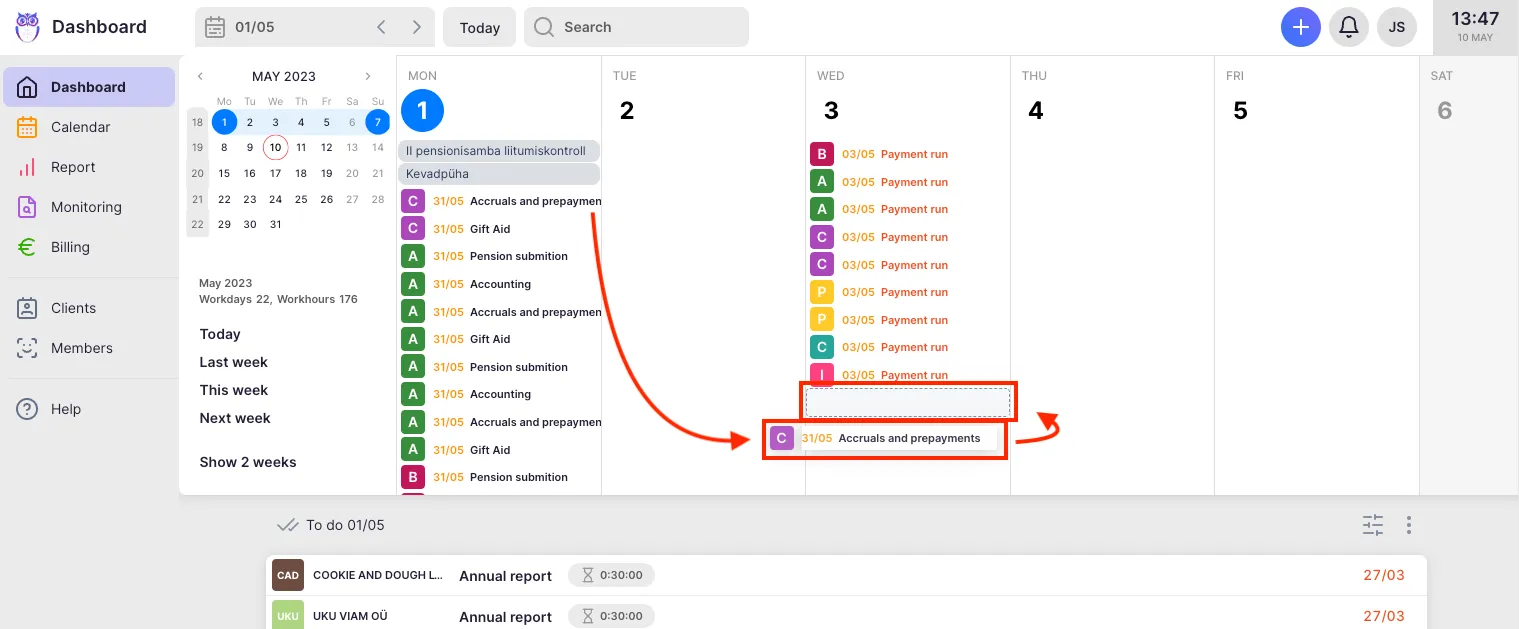
Creating tasks from the calendar
Section titled “Creating tasks from the calendar”- Click on any empty area within a day on the calendar.
- The task creation dialog opens with the date pre-filled to the day you clicked.
- Fill in the task details and save.
The new task appears on the calendar under the selected date.
Rescheduling tasks
Section titled “Rescheduling tasks”Drag any task from one day and drop it onto another day to reschedule it.
- If the new date is before the task’s due date (or the task has no due date), the task moves immediately.
- If the new date is after the task’s due date, Uku asks whether to also postpone the due date. Choose Yes to update both dates, or Cancel to leave the task where it was.
You can also reorder tasks within the same day by dragging them up or down. The order you set is saved and persists when you return to the calendar.
Understanding calendar items
Section titled “Understanding calendar items”Each task displays the client color, the task title, and optional indicators:
- A flag icon marks important tasks
- A dependency icon appears on tasks that depend on other tasks
- Overdue tasks appear in red
- Done tasks appear in a lighter, muted style
Click any task to open it.
Events and absences
Section titled “Events and absences”Calendar events appear above the task list for each day with a distinct icon and color:
| Event type | Color |
|---|---|
| **Company event** | Blue |
| **Vacation** | Brown |
| **Flextime vacation** | Brown |
| **Sick leave** | Brown |
| **Parental leave** | Brown |
| **Remote work** | Brown |
| **Member / contact birthday** | Pink |
| **Accounting news** | Grey |
Click any event to see details including the person, dates, linked client or project, and notes.
Time tracking
Section titled “Time tracking”Each day shows a time bar next to the date number:
- Tracked time (bold) — hours you have logged for that day
- Expected time — hours expected based on your Flextime agreement (defaults to 8 hours on workdays)
- A progress bar fills as tracked time approaches the expected time
- When fully tracked, the date circle and bar turn green
Click the time display to open the time report for that day. If tasks on that day have estimations, a separate estimation total appears below the tracked/expected line.
Adding company events
Section titled “Adding company events”Company Admins and Company Owners can create company-wide events that appear on every team member’s calendar.
- Click + Company event in the left sidebar.
- Select the Company this event belongs to.
- Enter a Name for the event.
- If the Flextime app is enabled, choose whether the event is Info (informational) or Holiday (counts as free time for flextime tracking).
- Set the dates. Check All day(s) for full-day events, or uncheck it to set specific start and end times.
- Optionally add a Link and Notes.
- Click Save.
To edit or delete an existing company event, click on it in the calendar and use the edit button in the popup.
Filters
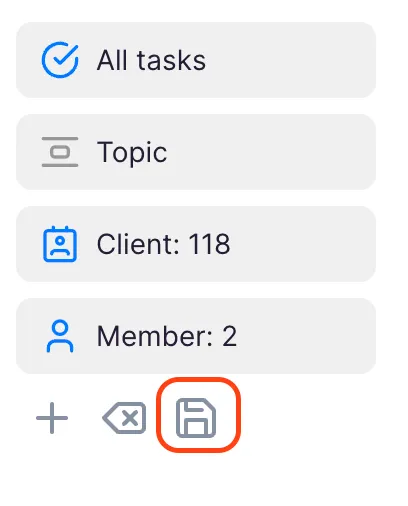
Section titled “Filters”Use the filter bar in the left sidebar to narrow what appears on your calendar:
- Member — show tasks for specific team members (defaults to you)
- Client — filter by client
- Topic — filter by topic
- Status — filter by task status
- Company — filter by company (for multi-company setups)
- Project — filter by project (requires Projects feature)
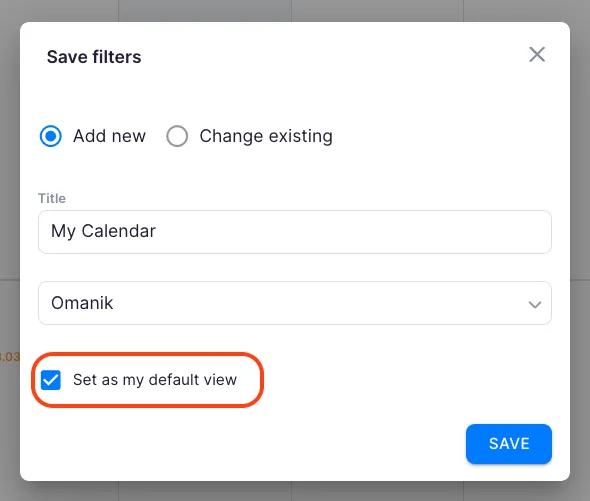
Save your current filter combination as a bookmark by clicking the save icon in the filter bar. Saved bookmarks load all filters automatically when selected.
Troubleshooting
Section titled “Troubleshooting”A task is not appearing on the expected day
Section titled “A task is not appearing on the expected day”Check the task’s start date. Tasks appear on their scheduled start date, not today’s date. If the task has no start date set, it may not appear in calendar view.
The time progress bar is missing
Section titled “The time progress bar is missing”The progress bar requires a Flextime agreement to be configured for your account. If you have not set one up yet, go to your member profile and confirm the Agreements tab shows an active agreement.
Colleagues’ tasks are not visible
Section titled “Colleagues’ tasks are not visible”Open the filter bar in the left sidebar and add the relevant team members under the Member filter. By default, the calendar shows only your own tasks.
Company events are not appearing
Section titled “Company events are not appearing”Open Settings in the left sidebar and confirm the Company events checkbox is enabled. If the event was just created, try refreshing the page.