How to use project statuses in Uku
This content is not available in your language yet.
Project statuses represent the stages a project moves through from start to completion — for example, “Not yet in,” “In Office,” “Ready for Filing,” or “Completed.” Setting a status on a project controls which tasks from the project’s workflow template appear on the Dashboard at any given time.
Who can do this
Section titled “Who can do this”- Company Admins and Company Owners can create and edit project statuses in workflow templates.
- All team members can view projects by status and use status filters on the Dashboard.
Set up project statuses in workflow templates
Section titled “Set up project statuses in workflow templates”- Go to Settings & Apps → Projects → Templates.
- Create or edit a workflow template.
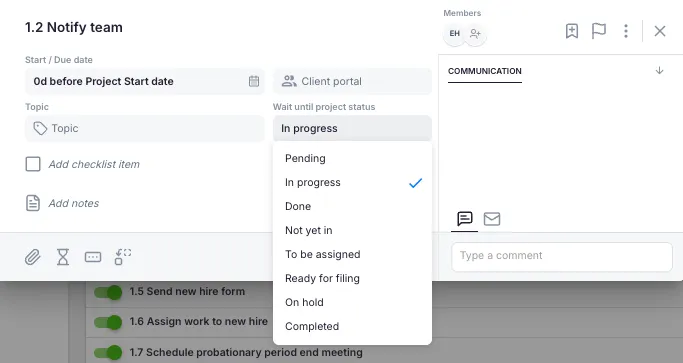
- For each task in the template, set the Wait until project status field.
- Choose which status the project must have for this task to be visible on the Dashboard.
Example — tax return project workflow:
- Data collection tasks — require status: “Not yet in”
- Preparation tasks — require status: “In Office”
- Review tasks — require status: “In for Checking”
- Filing tasks — require status: “Ready for E-Filing”
This ensures team members only see tasks relevant to the project’s current stage.
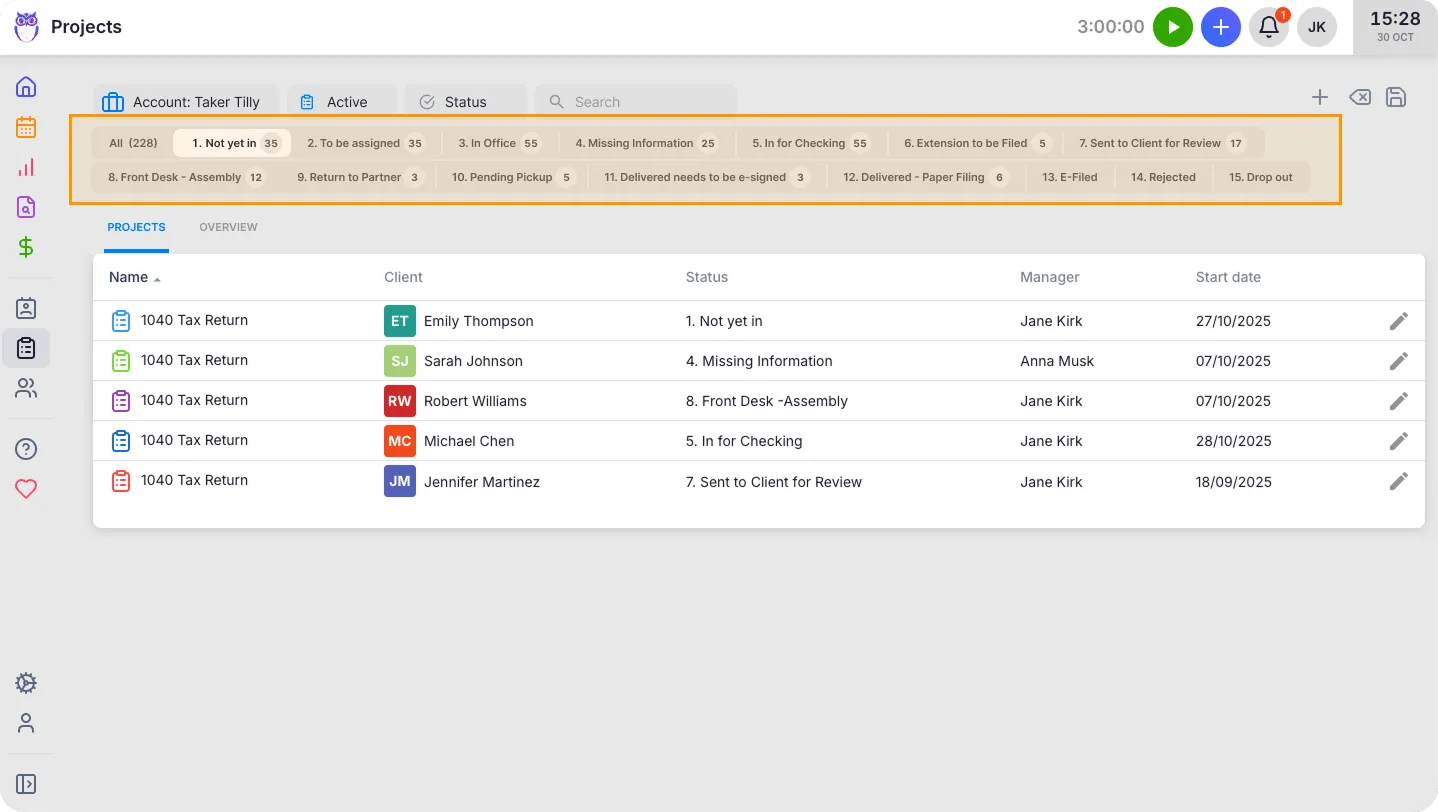
View projects by status
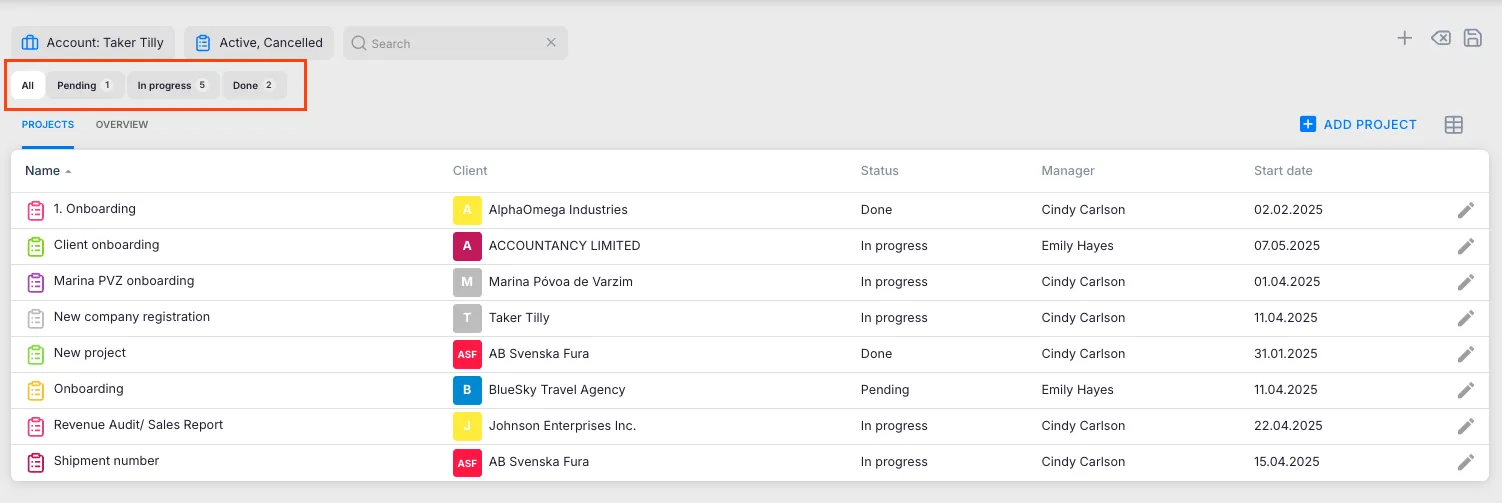
Section titled “View projects by status”- Select Projects from the main navigation.
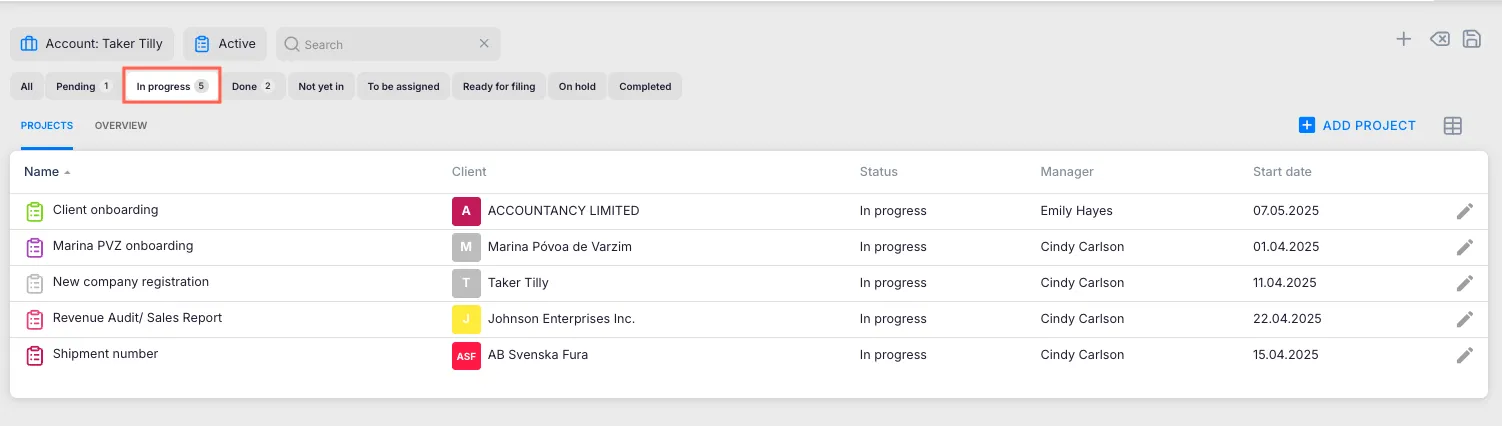
- View the status tabs showing all your statuses with project counts.
- Select any status tab to filter the project list.
Use the Status filter dropdown to view projects in specific statuses, select multiple statuses at once, or combine with other filters (client, member, date range).
Group Dashboard tasks by project status
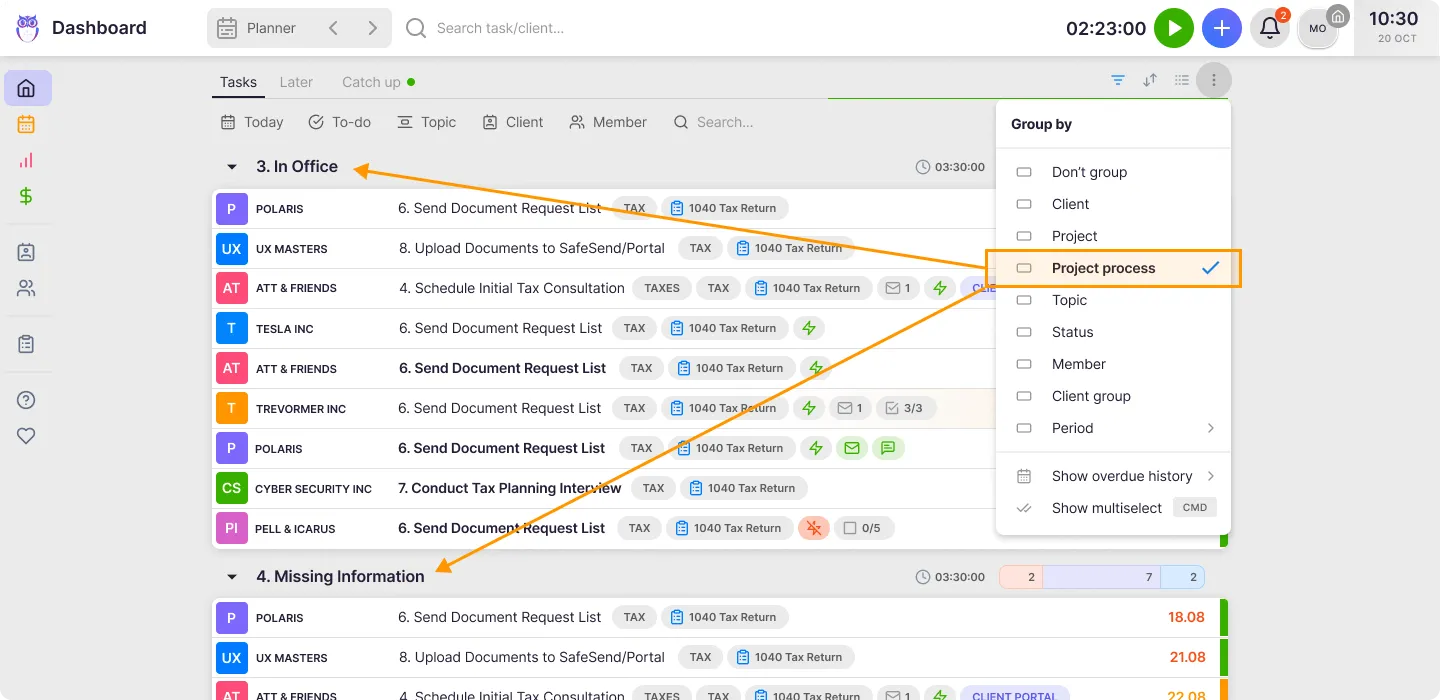
Section titled “Group Dashboard tasks by project status”- Open the Dashboard.
- Click the Grouping icon.
- Select Group by: Process Status.
Tasks now appear under their project status headers, helping you prioritize work based on project urgency and stage.
Filter Dashboard tasks by project status
Section titled “Filter Dashboard tasks by project status”- Open the Dashboard filters.
- Find the Status filter.
- Select one or more project statuses.
- The Dashboard shows only tasks from projects in the selected statuses.
- Save this filtered view as a bookmark if needed.
Filter projects by status in reports
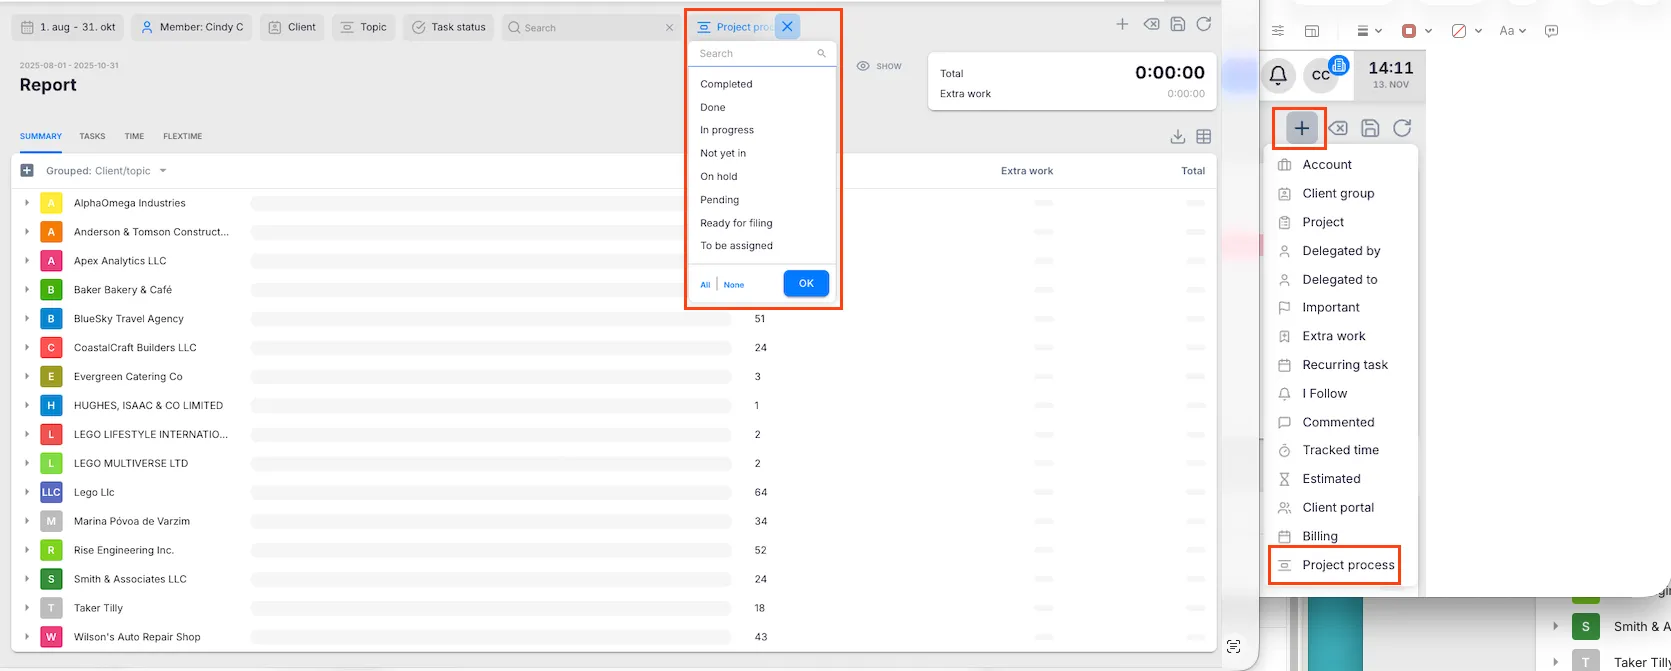
Section titled “Filter projects by status in reports”- Go to the Report view.
- Open the Filters section.
- Select the Project Status filter and choose the statuses you want to analyze.
- Add additional filters (date range, members, clients).
- View results in the Tasks or Summary tab.
Troubleshooting
Section titled “Troubleshooting”Tasks not appearing on the Dashboard for a project
Section titled “Tasks not appearing on the Dashboard for a project”Check the Wait until project status setting in the workflow template. If the project’s current status does not match the required status for that task, the task remains hidden until the project advances to the required status.
Status tabs missing from the project list
Section titled “Status tabs missing from the project list”Statuses must be defined in your workflow templates. If no templates use statuses, the status tabs will not appear. Create or update a workflow template in Settings & Apps → Projects → Templates.
Cannot change a project’s status
Section titled “Cannot change a project’s status”Verify you have the correct permissions to edit the project. Open the project and update the status field directly from the project details view.
Status filter not showing expected results in reports
Section titled “Status filter not showing expected results in reports”Ensure you have selected the correct statuses and that other active filters (date range, members) are not excluding the projects you expect to see.
Screenshots
Section titled “Screenshots”