Managing contacts
This content is not available in your language yet.
Who can do this
Section titled “Who can do this”| Action | Required permission |
|---|---|
| View contacts | Any member with access to the client |
| Add or edit contacts | Company Members with client management rights (Company Admin or member with edit access) |
| Delete contacts | Members with client management rights |
| Send portal invitations | Members with client edit rights |
| Configure contact roles | Company Owner or Company Admin |
| Configure contact custom fields | Company Owner or Company Admin |
Adding and editing contacts
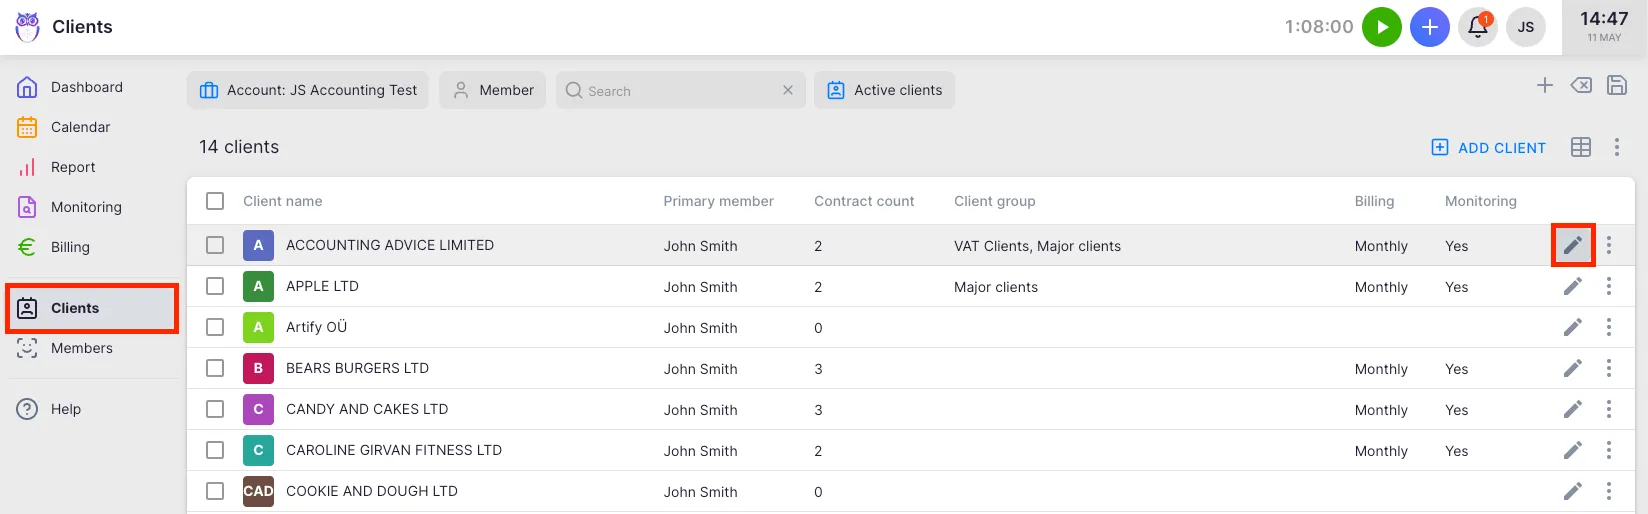
Section titled “Adding and editing contacts”Contacts are managed from the client edit form. Open it by navigating to a client’s profile and clicking Edit.
- In the Contacts section of the form, click Add contact.
- Fill in the contact’s details and click Save.
To edit an existing contact, open the client sidebar (the right-hand panel on the client profile page), hover over a contact card, and click the pencil icon that appears.
Contact fields
Section titled “Contact fields”- First name and Last name
- Email — required if the contact will have Client Portal access
- Mobile phone and Work phone
- Job title — a free-text label shown next to the contact’s name (e.g. “CFO”)
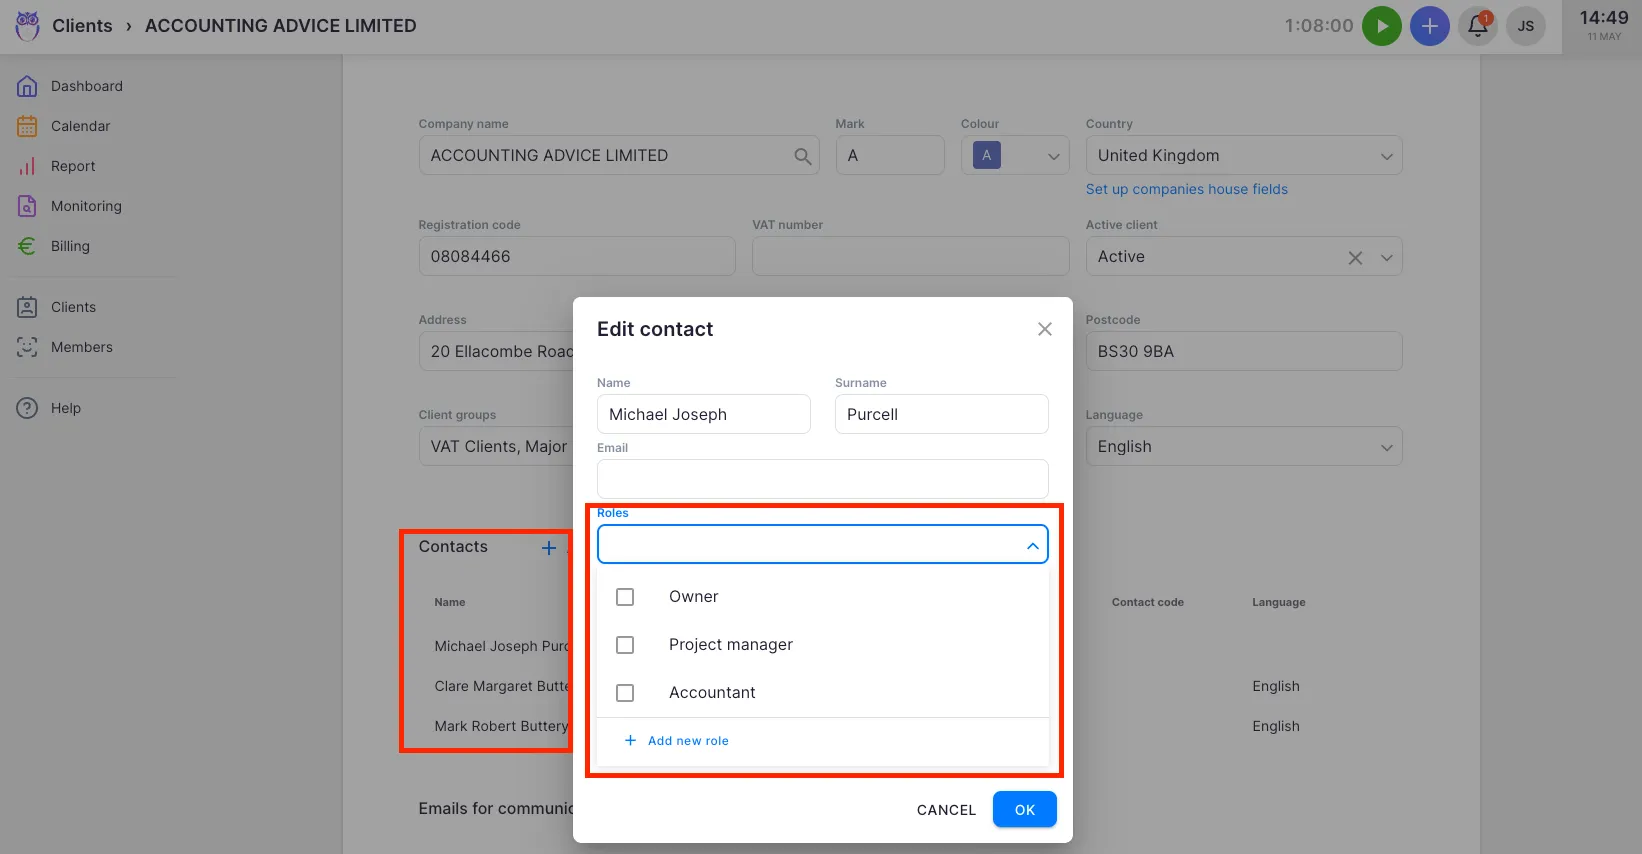
- Role — one or more roles from your configured contact role list
- Language — the contact’s preferred language, used for portal notifications and translated task templates
Additional custom fields may appear depending on your configuration (see Contact custom fields below).
One contact can be marked as primary with the star icon. The primary contact is highlighted across the application.
Contact roles
Section titled “Contact roles”Roles let you categorize contacts by their function within the client company — for example “Managing director”, “CFO”, or “Signing authority”. A contact can have multiple roles.
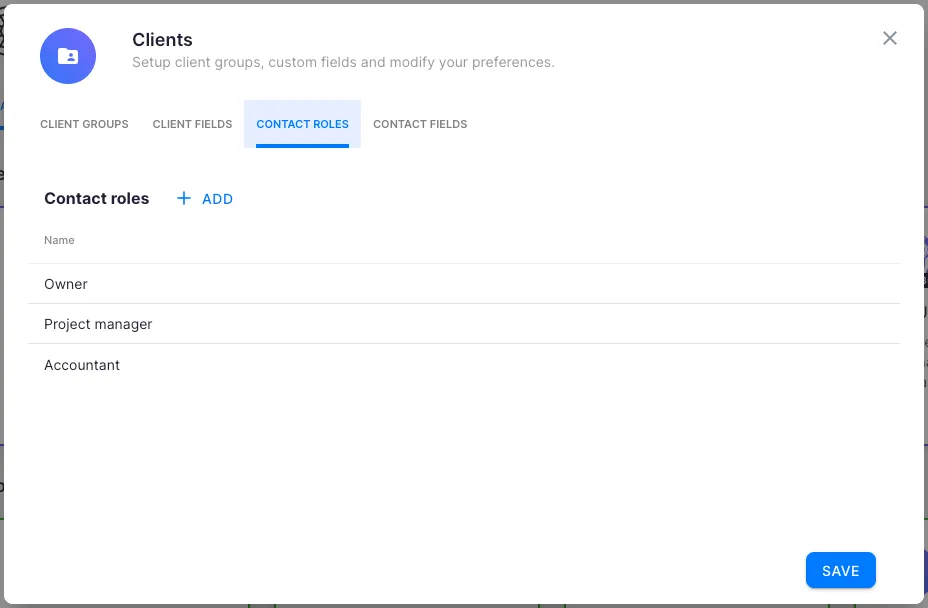
To configure contact roles:
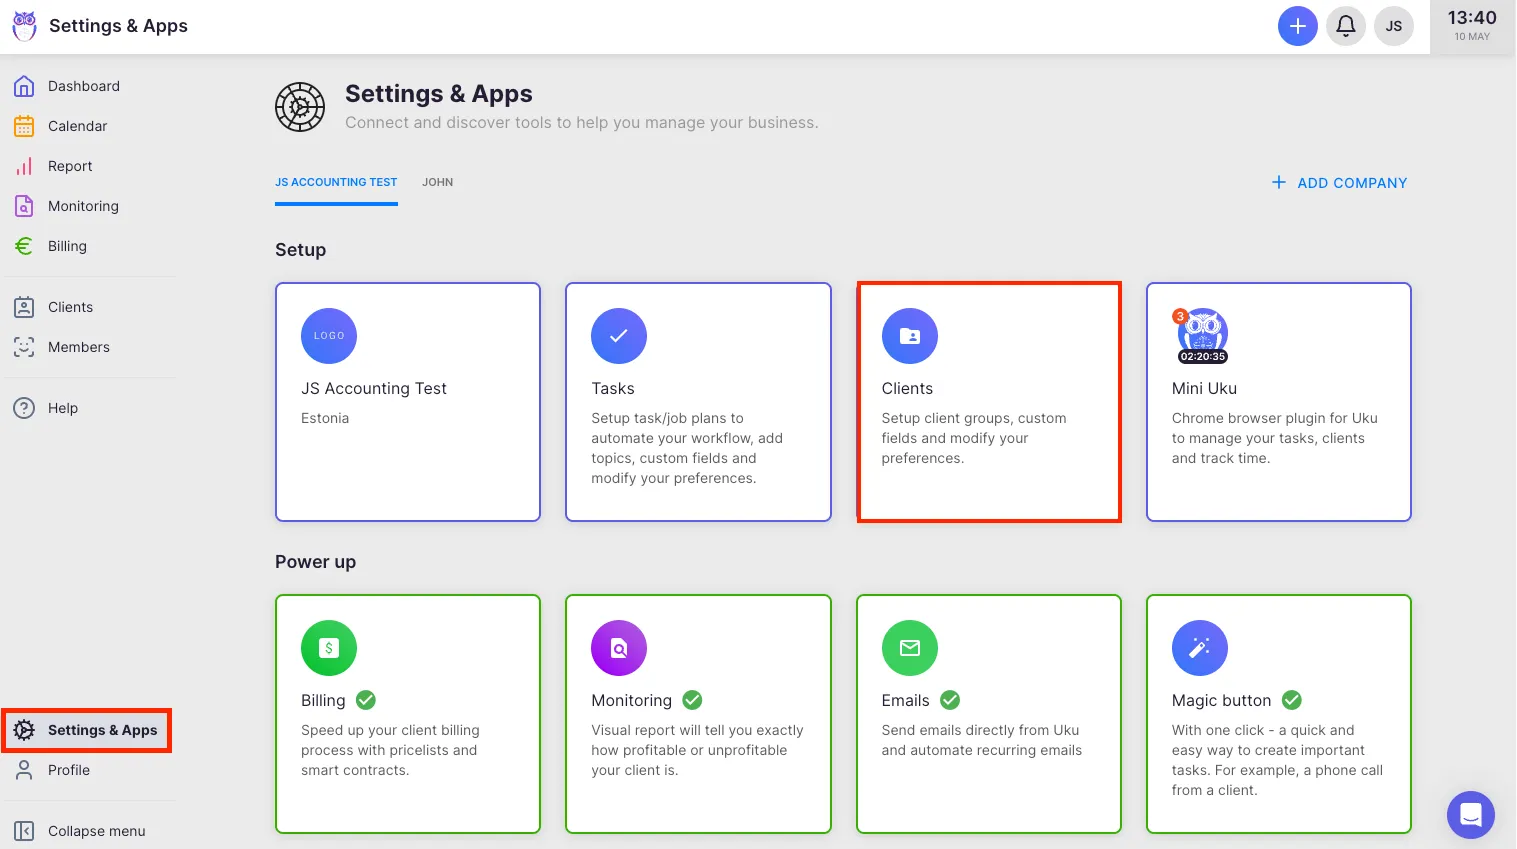
- Go to Settings & Apps → Client App → Contact Roles tab.
- Click Add to create a new role.
Roles are shared across all clients in your company account. When editing a contact, select one or more roles from the roles field — the selected role names appear on the contact card in the client sidebar.
Contact custom fields
Section titled “Contact custom fields”Custom fields let you capture additional information on contacts beyond the built-in fields — for example a national ID number, LinkedIn URL, or any field specific to your workflow.
To configure contact custom fields, go to Settings & Apps → Client App → Contact Fields tab. Inside the contact edit dialog, you can also click Manage contact fields at the bottom to navigate directly to this settings page.
Client Portal access per contact
Section titled “Client Portal access per contact”If the Client Portal is enabled for your account, you can grant individual contacts access to the portal for each client they are associated with.
- Open the contact edit dialog.
- Enable the portal access toggle for contacts who should be able to log in and view tasks.
- Make sure the contact has a valid email address — it is required for portal access.
Sending Client Portal invitations
Section titled “Sending Client Portal invitations”Once a contact has portal access enabled, you can send them an invitation email:
- Open the client’s profile page.
- In the right-hand sidebar, find the contact card.
- If the contact has portal access, a line shows either “Client portal invite has not been sent” or the date the last invite was sent.
- Click Send invite (or Resend invite) to dispatch the invitation email.
The invitation sends the contact a login link for the Client Portal. The sent timestamp is recorded on the contact.
Bulk Client Portal activation
Section titled “Bulk Client Portal activation”You can activate the Client Portal and send welcome invitations to multiple clients at once from the client list. Select clients using the checkboxes, then use the Client Portal bulk action. You can choose to automatically send a “Welcome to the Client Portal” task to all eligible contacts (those with a valid email and portal access enabled).
Exporting contacts
Section titled “Exporting contacts”- Go to Clients in the main navigation.
- Open the action menu (three-dot menu at the top-right of the client list).
- Select Export client contacts.
The CSV file downloads immediately, respecting any active filters on the client list. If you are on the Contacts tab, the option is labeled Export contacts.
Troubleshooting
Section titled “Troubleshooting”The portal access toggle is not visible in the contact dialog
Section titled “The portal access toggle is not visible in the contact dialog”The portal access toggle only appears when the Client Portal is enabled for your company account and the client’s portal is active. Enable the Client Portal for the specific client first (from the client list bulk action or the client’s profile), then return to edit the contact.
The Send invite button is missing from the client sidebar
Section titled “The Send invite button is missing from the client sidebar”The Send invite button appears only for contacts who have portal access enabled and a valid email address. Make sure both conditions are met in the contact’s record. If the button is still not visible, your role may not include the right to send portal invitations — contact your Company Admin.
I cannot find a contact in the client sidebar
Section titled “I cannot find a contact in the client sidebar”Contacts are shown in the client sidebar on the client profile page. If the sidebar is not visible, look for a panel toggle or scroll to the right of the page. Contacts are also accessible in the client edit form under the Contacts section.
Screenshots
Section titled “Screenshots”